Last updated on September 23rd, 2026 at 07:56 am
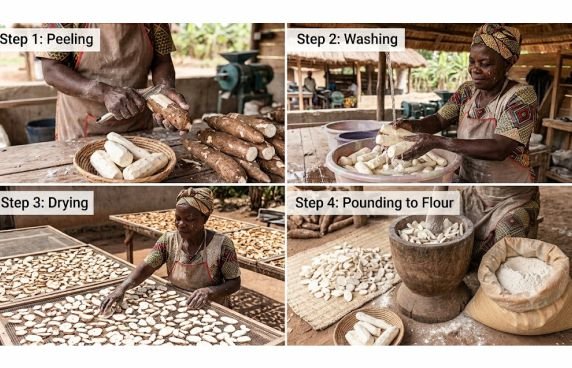
The traditional method of making cassava flour follows the same core steps used across generations: peeling, washing, sun-drying, and grinding cassava roots by hand.
It requires almost no equipment beyond a knife, a drying surface, and a mortar and pestle or small mill.
This makes it the easiest entry point for home cooks and small producers, even though the process takes several days from root to finished cassava flour.
It also carries real safety value, since proper drying meaningfully reduces the cyanogenic compounds naturally present in unprocessed cassava, a crop that provides energy for roughly 500 million people worldwide, according to research published on PubMed.
This guide walks through every step, from selecting roots through storage, with real sourcing behind the safety claims.
If you want to know all the methods of making cassava flour, read our full guide on how to make cassava flour.
Table of Contents
How to Make Cassava Flour The Traditional Way
Selecting and Preparing Your Cassava
Variety matters less for the traditional method than freshness and maturity of the root.
Roots that are firm and free of disease produce better flour than roots left too long in the ground, which turn woody and reduce starch quality.
This guide on signs cassava is ready to be harvested covers exactly what to look for.
This post on how to harvest cassava roots covers the technique that avoids root damage.
For a broader look at how variety affects processing generally, our cassava basics guide covers the full picture.
Peeling and Washing
Trim both ends of the root before peeling, which makes the tough outer skin easier to remove in long strips with a sharp knife or machete.
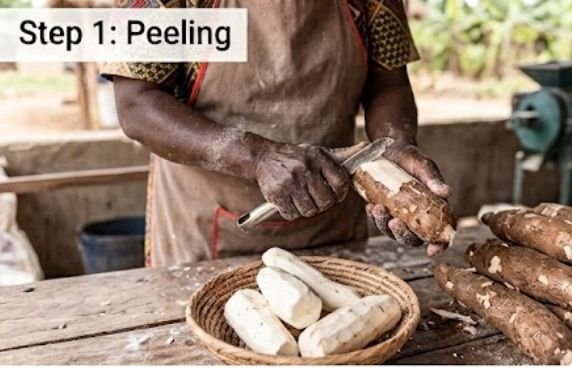
Cut shallow to avoid wasting flesh, since deep cuts lower your final flour yield for no real benefit.
Once peeled, wash the roots thoroughly under running water or in a large basin.
Peeling and grating alone accounted for roughly 71 percent of total cyanide reduction in one detoxification study.
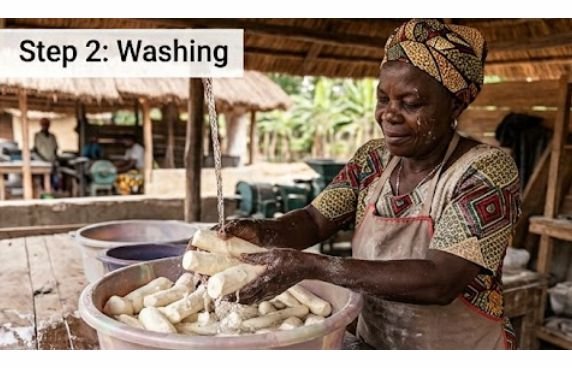
This comes from research summarized on ScienceDirect, since cyanogenic glycosides concentrate heavily in the root’s skin.
Sun-Drying: The Step That Decides Safety
Spread peeled, washed cassava pieces on trays or mats and dry them in direct sun for several days, depending on weather.
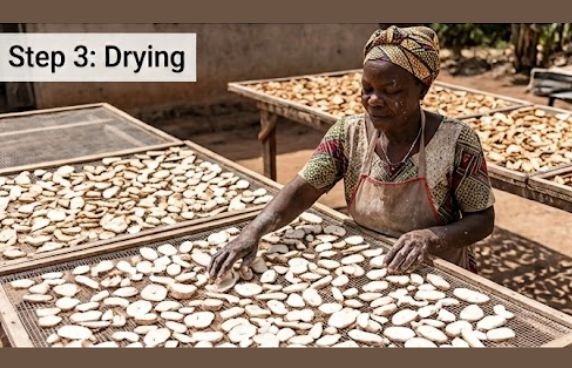
This step matters more than any other in traditional cassava flour production.
Sun-drying reduced cyanide levels by roughly 57 percent in one controlled study, based on research published on PMC.
Sun-drying outperforms oven drying for this purpose, since the slower process gives natural enzymes more time to break down cyanogenic compounds before heat halts the reaction.
Weather-dependent timing is the main drawback, since humid or rainy conditions stretch drying out and raise mold risk if roots are not turned and monitored regularly.
Pounding, Milling, and Sieving
Once cassava is dried to the right moisture level, chop it into smaller pieces to make grinding easier.
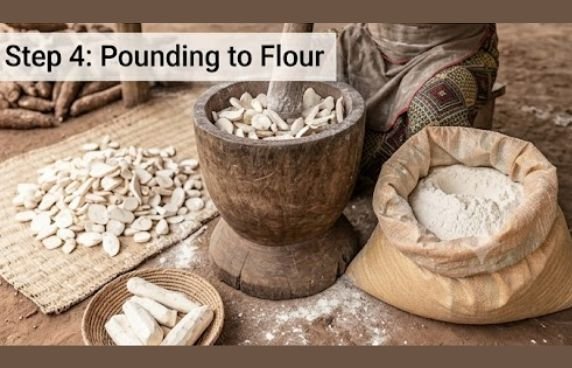
The traditional method uses a mortar and pestle to pound the dried pieces, which keeps the flour’s texture intact while releasing starch efficiently.
On my own farm, a simple blender handles this step for home batches, speeding up an otherwise labor-intensive stage without losing what makes the method traditional.
After pounding, sieve the flour to separate fine particles from coarse ones, re-pounding anything left behind until the texture is consistent.
The fineness you sieve to depends on what the flour will be used for, since baking generally wants a finer grind than thickening a stew.
Storing Your Traditional Cassava Flour
Keep finished flour in an airtight container in a cool, dry place away from direct sunlight, since moisture is the main threat to shelf life.
Properly processed traditional flour should fall under the World Health Organization’s safe level of 10 mg HCN equivalents per kilogram, based on cyanide processing research.
Traditional storage in woven baskets or clay pots still works if airflow stays controlled and the material does not affect flavor.
Our full guide on how to store and preserve cassava flour covers humidity control, refrigeration, and freezing in more depth than fits here.
Why Traditionally Made Flour Still Matters
Traditional processing retains more of cassava’s natural flavor and texture than industrial methods, which prioritize speed over character.
This flour holds up well in dense, chewy dishes like fufu, and it brings a fuller flavor to baked goods than more processed alternatives.
Our post on cassava bread covers how this flour performs across different bread styles and preparation methods in detail.
How This Compares to Other Methods
If sun-drying alone does not fit your timeline, fermenting first adds further cyanide reduction and a tangy flavor, at the cost of extra days.
For volume beyond what hand-processing can support, our guides to the industrial method and HQCF method cover mechanized alternatives.
Conclusion
The traditional method of making cassava flour asks for patience rather than equipment, and that trade has kept it alive across generations.
Peeling, washing, sun-drying, and pounding each play a real role in producing flour that is safe and true to the root itself.
On my own farm, this remains the method I reach for most, even with faster options available.
If you are making flour for the first time, start here before considering fermented, industrial, or HQCF processing.
Follow the steps in order, and do not skip the drying stage, since that decides safety.
Frequently Asked Questions
Can I make cassava flour without drying it first?
No, drying is a critical safety step that reduces cyanogenic compounds, removes moisture, and prevents mold, so skipping it makes the flour unsafe.
How much does sun-drying actually reduce cyanide levels?
Sun-drying alone reduced cyanide levels by roughly 57 percent in one study, and combining it with fermentation removes even more before grinding.
What equipment do I actually need for the traditional method?
Traditional flour needs only a knife, a drying surface, and a mortar and pestle or small mill, making it the most accessible method for home use.
How long does traditionally made cassava flour last in storage?
Store it in an airtight container in a cool, dry place, where properly dried traditional flour can stay fresh for close to a year.

Chimeremeze Emeh is a tropical crop farmer and chemical engineer from Ntigha, Isiala Ngwa North LGA, Abia State, Eastern Nigeria, specializing in cassava and palm oil, with over 30 years of hands-on experience growing, harvesting, and processing cassava. He grows TMS series, TME 419, and local traditional varieties on his own farms and operates a small-scale cassava flour and starch production business through Cassava Pathway, which he founded as a CAMA-registered agribusiness in 2024. He is also the founder of Palm Oil Pathway, where he applies the same tropical farming expertise. His farms are located in Ntigha, Abia State.