Cassava pie crust is a gluten-free game-changer that brings a chewy, golden base to your favorite pies. Here’s how to make it crisp, firm, and flavorful every time.
Cassava pie crust gives you a way to make pies that match your diet without giving up taste or texture.
If you’re looking for a gluten-free crust that doesn’t fall apart or feel heavy, cassava flour is a solid choice.
It comes from the cassava root and works well for both sweet and savory recipes.
Whether you’re following a paleo plan, avoiding gluten, or just trying something different, this crust fits right in.
You’ll notice the difference as you press it into your pie dish: firm but easy to shape with a soft finish and a slightly nutty flavor.
It holds fillings without breaking and gives you that bite you want in a good pie.
People around the world have used cassava in cooking for years. Now, you can turn it into your go-to base for any pie you want to make. Check our comprehensive guide on cassava pie.
What is Cassava Pie Crust?
Cassava pie crust (the firm outer layer of baked goods that provides structure and holds fillings) is a gluten-free crust made using cassava flour or grated cassava, derived from the starchy root of the cassava plant.
It serves as a wheat-free alternative for pie bases, offering a soft yet sturdy texture that holds fillings well without becoming soggy or crumbly.
Mild in flavor with a hint of earthiness, cassava pie crust works for both sweet and savory dishes, making it a flexible choice for various recipes.
It’s especially popular among those with gluten sensitivities, clean eating habits, or a paleo lifestyle.
Related: How Healthy is Cassava Tortilla?
Why Use Cassava for Pie Crust?
Cassava pie crust gives you more than just a gluten-free option. It brings taste, structure, and nutrition to the table without the common issues found in wheat alternatives.
Check out the vegan version here.
Gluten-Free and Celiac-Friendly
If you need to stay away from gluten, cassava flour is a reliable base as it contains no gluten at all.
This makes it a smart choice if you’re managing celiac disease or have gluten intolerance.
You don’t have to worry about cross-contamination with wheat, and you still get a pie crust that holds its shape and delivers a good bite.
Unlike many gluten-free options that fall apart or dry out, cassava crust stays firm and bakes evenly.
Packed with Energy and Nutrients
Cassava isn’t just starch. It gives your crust a natural source of energy from its high carbohydrate content.
You’ll also get a boost of vitamin C, some B vitamins, and dietary fiber.
These nutrients support digestion and help keep your energy steady.
If you’re using cassava for baking, you’re not only avoiding allergens but also adding real food value to your recipe.
That makes your pie crust more than just a shell; it becomes a part of the meal. See more on the nutritional profile of cassava.
Great Taste and Texture
When you bake with cassava flour, you get a crust that’s soft yet firm enough to hold any filling.
It has a mild, slightly nutty flavor that adds character without overpowering your pie.
You’ll notice a tender bite, closer to traditional crusts than many store-bought gluten-free versions.
It also browns nicely, giving your pies a finished look and a warm flavor.
If you’re looking for something that works across sweet and savory pies, cassava crust delivers with ease.
Related Posts
- Recipe for Bermudian Cassava Pie
- Cassava-based Foods Around the World
- Cassava Cake Recipes
- 12 Manioc Foods from Latin America
- The Numerous Cassava Products
- How to Make Filipino Cassava Pie
- How to Make Vietnamese Cassava Pie
Types of Cassava Used in Pie Crusts
You have more than one way to use cassava in your pie crust. Each form gives you a different texture and finish, so your choice depends on what you’re baking.
Fresh Grated Cassava
If you’re going for a dense and chewy crust, fresh grated cassava is a strong option.
You’ll need to peel, grate, and sometimes soak it first to reduce bitterness and remove extra starch.
This process may take more time, but it gives you a hearty crust that pairs well with savory or meat-based fillings.
You get more moisture and a slightly rustic texture, which can make your pies feel closer to home-cooked, traditional dishes.
Cassava Flour
Cassava flour is ground from the whole root and is the most popular form used in gluten-free baking.
It’s easy to measure, mixes well with other ingredients, and gives you a light but sturdy crust.
If you want something that bakes evenly, holds fillings well, and doesn’t overpower the pie’s flavor, this is the form you should try.
You can use it for fruit pies, quiches, or any filling that needs a solid but flaky base.
Tapioca Flour
Tapioca flour is different from cassava flour. While cassava flour is from the whole root, tapioca flour comes from the starch of the cassava root.
You shouldn’t use it on its own for crusts because it lacks body, but when you mix it with cassava flour, it helps improve stretch and texture.
This combo can keep your crust from cracking or crumbling while still giving you a tender bite.
It’s especially useful when you’re working with recipes that need flexibility, like hand pies or tarts that must hold shape during baking.
Related: How to Make Trinidad Cassava Pie
Cassava Pie Crust Recipes (How to Make Cassava Pie Crust)
Cassava flour is a versatile, gluten-free alternative that makes for an excellent pie crust base.
Below are two distinct recipes: a savory cassava pie crust and a sweet cassava pie crust.
Both recipes offer a delightful solution for those avoiding gluten while still indulging in delicious pies.
Basic Savory Cassava Crust
This simple savory cassava pie crust gives you a gluten-free base that works for quiches, meat pies, and veggie-packed tarts.
It’s easy to prepare and holds together without crumbling.
Ingredients You’ll Need
- 1 ½ cups cassava flour
- ½ teaspoon salt
- ¼ cup olive oil or melted coconut oil
- 4 to 5 tablespoons cold water
These ingredients create a dough that’s pliable, mild in flavor, and sturdy enough to handle wet or dense fillings.
Using cassava flour gives you the structure you need without gluten, and the oil adds moisture and richness.
Cold water binds it all together without making the crust heavy.
Mix Your Dough with Care
Start by combining cassava flour and salt in a bowl. Mix them well so the salt spreads evenly through the flour.
Add your oil and use a fork or your fingers to blend it in. The mixture should start to look like coarse crumbs.
Now, pour in the cold water one spoonful at a time. Stir gently until it forms a soft dough that sticks together without being sticky.
If it feels too dry, add another spoonful of water, but don’t overdo it.
Let the Dough Rest
Once your dough comes together, shape it into a disk. Wrap it in parchment paper and place it in the fridge for about 30 minutes.
This resting time allows the flour to absorb the moisture fully and makes the dough easier to roll out.
It also helps keep the crust tender once baked. Skipping this step could give you a crust that cracks or shrinks in the oven.
Roll and Shape the Crust
After chilling, take the dough out and let it sit for a few minutes at room temperature.
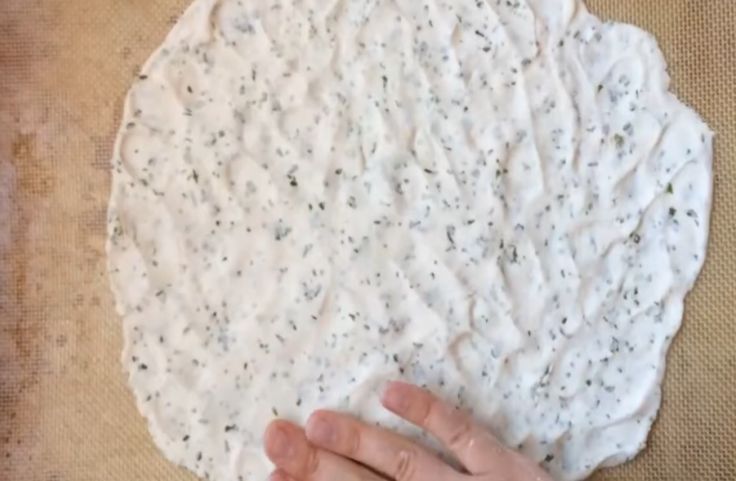
Place it between two sheets of parchment paper and roll it out evenly. This keeps it from sticking and tearing.
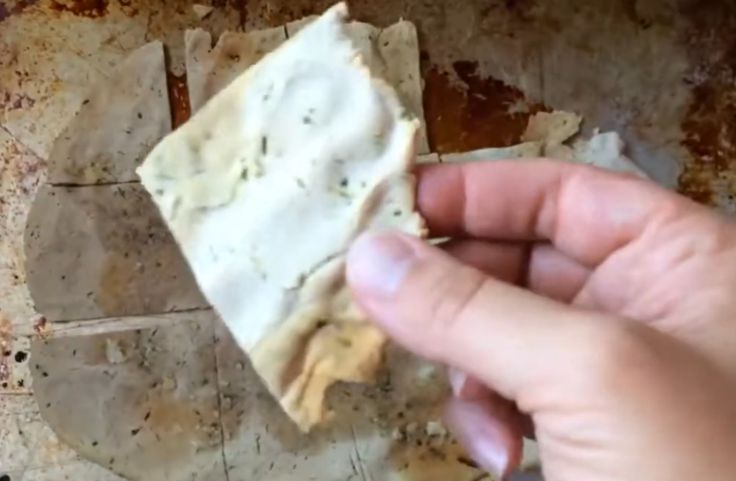
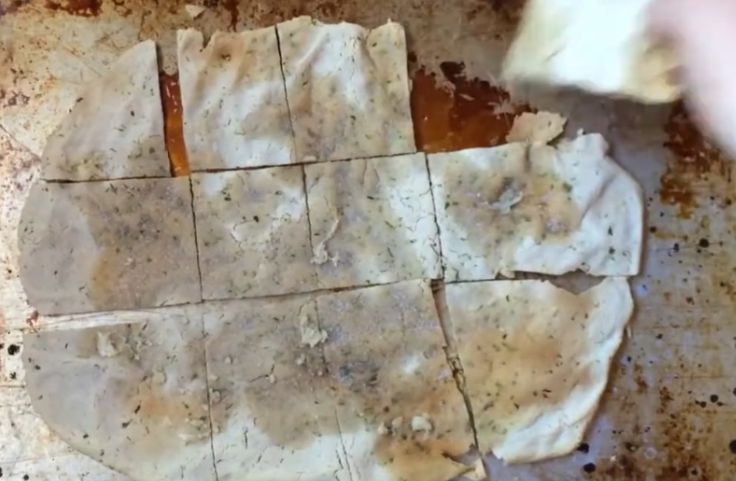
Aim for about a quarter-inch thickness. Carefully transfer the crust into your pie pan and press it gently into the bottom and sides.
Trim any overhang and prick the base with a fork to keep bubbles from forming.
Pre-Bake Before Filling
Set your oven to 375°F or 190°C. Pre-bake the crust on its own for 15 to 20 minutes until it just starts to turn golden around the edges.
This step helps the crust stay firm once you add your filling, especially if it’s wet or takes longer to cook.
If you’re baking a fully cooked filling like sautéed vegetables or pre-cooked meats, this pre-bake keeps the crust from going soggy.
This basic savory cassava crust works well with everything from spinach and cheese fillings to spicy minced meat or mushrooms.
You can even flavor the dough with herbs like thyme or rosemary if your filling calls for extra flavor.
Let me know if you’d like a sweet version or flavor pairings that work best with cassava crust.
Sweet Cassava Pie Crust Variation
If you’re baking fruit pies, coconut cream, or any dessert-style filling, this sweet cassava crust gives you a soft, golden shell with a touch of natural sweetness and a hint of spice.
Ingredients You’ll Need
- 1 ½ cups cassava flour
- ½ teaspoon salt
- ¼ cup melted coconut oil
- ½ teaspoon cinnamon (optional)
- 3 to 4 tablespoons maple syrup or honey
- 4 to 5 tablespoons cold water
This recipe uses cassava flour as the base but adds coconut oil and a natural sweetener to balance out fruity or creamy fillings.
Cinnamon brings warmth, especially if you’re pairing it with apples, berries, or custards.
Mix the Dry and Wet Ingredients
Start by whisking the cassava flour, salt, and cinnamon in a mixing bowl. Stir them until they’re evenly combined.
Pour in the melted coconut oil and sweetener of your choice. Maple syrup gives a deeper flavor while honey adds floral notes.
Use a spoon or fork to blend everything until it forms clumps.
Slowly add the cold water, a tablespoon at a time, until the dough holds together when pressed but is not sticky. If it feels dry, add a bit more water.
Chill Before Rolling
Form the dough into a flat disk and wrap it in parchment paper. Chill it in the fridge for 30 minutes.
This resting time helps the dough firm up and makes it easier to handle later.
It also gives the flour time to absorb the liquids and prevents cracking when you roll it out.
Roll and Transfer with Ease
Remove the dough from the fridge and let it sit for a few minutes at room temperature.
Place it between two sheets of parchment paper and roll it out gently to about a quarter-inch thick.
Carefully lift it into your pie dish and press it down into the corners without stretching.
Trim the edges neatly and use a fork to poke small holes in the bottom to release steam while baking.
Pre-Bake for Best Results
Set your oven to 375°F or 190°C. Pre-bake the crust for 15 to 20 minutes until the edges start to turn golden.
This step keeps the bottom crisp and prevents it from soaking up moisture from fillings like custard, banana cream, or fruit compote.
Once pre-baked, let it cool slightly before filling.
This sweet cassava crust gives your dessert pies a smooth texture and a light crunch.
It holds together well, adds flavor without being overpowering, and brings out the natural sweetness in your filling.
You can also add ground nutmeg or vanilla to the dough if your pie calls for a little extra aroma.
Let me know if you want a no-bake option or crust flavor ideas based on different pie fillings.
Related: The Fiji Cassava Pie Recipe
Tips for a Perfect Cassava Pie Crust
Getting a cassava pie crust right comes down to a few smart choices. From moisture control to binding methods, here’s how you can make sure your crust comes out firm, golden, and delicious.
Prevent a Soggy Base
To avoid a soggy cassava pie crust, pre-bake it for 10 to 15 minutes before filling.
Always cook or cool wet fillings first, so they don’t soak the crust. This step ensures a firm, dry bottom.
Use the Right Binders
Since cassava flour lacks gluten, binders like eggs, flaxseed meal, or psyllium husk are key.
They help the crust hold together, improve texture, and prevent crumbling when sliced, especially in vegan or gluten-free baking.
Roll It to the Right Thickness
A quarter-inch thickness works best for cassava crusts. It bakes evenly and holds shape without cracking or turning tough.
Use parchment when rolling to prevent sticking and maintain an even surface throughout for consistent baking.
Know When to Pre-Bake
Pre-bake the crust for savory pies or fillings that release moisture during baking.
For no-bake or fully baked sweet pies, chilling the crust may work. A quick pre-bake adds structure and keeps the base from softening.
Common Mistakes to Avoid
Making cassava pie crust at home is doable, but a few small missteps can throw things off.
If you know what to look out for, you can save time and avoid a frustrating result.
Overmixing the Dough
Once you add liquid, mix only until the dough holds together. Overworking cassava flour changes its texture and can leave your crust dry or rubbery.
Since it lacks gluten, there’s no need to knead it like wheat dough.
Use a gentle hand and stop mixing once it forms a soft, smooth ball.
Using Too Much Liquid
Cassava flour acts like a sponge. Adding too much water or oil makes the dough sticky and tricky to handle.
Start small with liquids and mix slowly. Add more only if the dough feels dry.
This keeps the crust firm, easy to shape, and prevents sogginess when it’s time to bake.
Skipping the Resting Time
Letting the dough rest gives cassava flour time to fully hydrate. If you skip this, the dough might crack or shrink while baking.
Chill it for at least 30 minutes before rolling. The rest makes it smoother to handle and helps your crust stay intact once filled and baked.
Ignoring Your Kitchen Conditions
Room temperature and humidity affect cassava dough. On warm days, it may feel too wet.
On cooler days, it might crumble. Watch the dough and adjust as needed.
If it’s sticky, dust in more flour. If dry, add a splash of water. Trust your hands over exact measurements.
Can You Freeze Cassava Pie Crust?
Yes, you can freeze cassava pie crust, making it easier to prepare gluten-free pies ahead of time.
For raw dough, shape it into a disc, wrap it tightly in plastic wrap, and seal it in an airtight container.
It keeps well in the freezer for up to three months. You can also freeze pre-baked cassava crusts; just let them cool first, then wrap and store them the same way.
To use a frozen crust, thaw it in the fridge overnight to keep the texture intact.
Once thawed, it’s ready to be filled and baked as usual. Freezing cassava crust helps you save time in the kitchen while always having a pie base on hand for quick meals or desserts.
Frequently Asked Questions
Can I use cassava flour instead of all-purpose flour for pie crust?
Yes, cassava flour is a gluten-free substitute for all-purpose flour. It offers a firm, flexible crust with a mild flavor and excellent structure.
Does cassava pie crust taste different from wheat crust?
Cassava crust has a soft, slightly nutty flavor. It’s more neutral than wheat, making it suitable for sweet and savory pies without overpowering the filling.
Is cassava flour safe for people with nut allergies?
Yes, cassava flour is nut-free. It comes from a root vegetable, making it safe for those with nut, soy, or grain allergies.
Can I make cassava pie crust without eggs or dairy?
Absolutely. Cassava pie crust works well with oil and water, and egg-free versions hold together when you add natural binders like flaxseed or psyllium husk.
Conclusion
Cassava pie crust is a gluten-free, allergy-friendly option that doesn’t skimp on texture or taste.
Whether you’re making savory meat pies or fruity desserts, it offers a reliable base that’s easy to shape, holds its form, and bakes to a golden finish.
With simple ingredients and straightforward techniques, even beginner bakers can master it.
Plus, its flexibility, freezer-friendliness, vegan adaptability, and ability to pair with many fillings make it a must-try for anyone looking to upgrade their pie game.
From preparation tips to freezing advice, this guide gives you all the tools to make cassava pie crust your go-to option.
Ready to impress your guests and satisfy your dietary needs? Then, cassava pie crust is your next baking essential.
References

Chimeremeze Emeh is a writer and researcher passionate about Africa’s most transformative root crop—cassava. Through his work at cassavavaluechain.com, he explores the entire cassava industry, from cultivation and processing to its diverse applications in food, health, and industrial use.
He also writes for palmoilpalm.com, where he shares his extensive experience and deep-rooted knowledge of palm oil, covering red palm oil, palm kernel oil, and refined products. His work there reflects his lifelong connection to agriculture and his commitment to promoting sustainable value chains in Africa.
Driven by curiosity and purpose, Chimeremeze aims to shed light on how cassava continues to empower communities, strengthen food systems, and link traditional farming wisdom with modern innovation.