
Last updated on December 12th, 2025 at 10:37 am
Vietnamese cassava pie is a golden, chewy treat that blends creamy coconut and rich cassava with deep cultural roots. Here’s why you might want to experience it.
Vietnamese cassava pie takes you straight into the heart of home baking.
You mix, pour, and wait as the sweet scent fills your kitchen, warm, nutty, familiar.
Each bite feels like something shared: between friends, across generations, at lively gatherings or quiet weekends.
You don’t need perfection, just fresh cassava, a bit of coconut milk, and the willingness to try.
Maybe you’ll add mung beans for texture or a touch of pandan for fragrance. Every version tells its own story.
This isn’t just a recipe, it’s a moment you create with your hands and enjoy with those around you.
If you’ve been searching for something comforting, easy, and rooted in tradition, you’re in the right place. Let’s walk through the steps and make it yours.
See a comprehensive guide on cassava pie.
What is Vietnamese Cassava Pie?
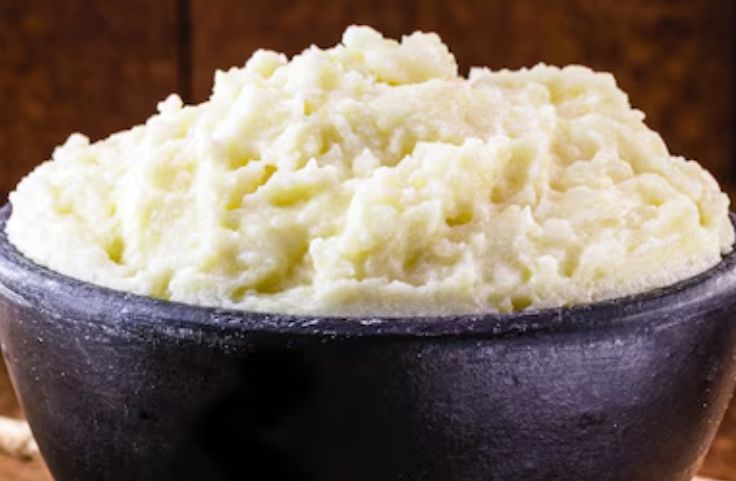
Vietnamese cassava pie, or bánh khoai mì, is a traditional dessert made with grated cassava, sugar, and coconut milk. It comes in two main forms: baked, known for its crisp edges and chewy center, and steamed, which offers a softer, more uniform texture.
Some versions include tapioca balls or mung beans for added bite and flavor.
Mildly sweet and naturally gluten-free, this pie is enjoyed as a snack, dessert, or festive treat.
Its appeal lies in its balance of creamy richness and subtle chewiness, making it a favorite in both everyday meals and special occasions.
Rooted in Vietnamese culinary heritage, the dish showcases the resourceful use of local ingredients and the warmth of home cooking passed through generations.
Key Ingredients in Vietnamese Cassava Pie
Vietnamese cassava pie brings together simple ingredients to create something rich in flavor and texture.
Each element plays a role in making the dessert chewy, creamy, and deeply satisfying.
Cassava: Your Base Ingredient
Use fresh or frozen grated cassava. Fresh gives a better texture but needs proper soaking and rinsing to remove bitterness.
Once prepped, it becomes the foundation, providing the chewy structure that defines this dessert and holds everything together perfectly.
Coconut Milk and Cream: Your Flavor Boost
Coconut milk softens the mixture and adds aroma. Coconut cream makes it thicker and creamier.
Combined, they bring a smooth finish and depth to the dessert, creating the comforting flavor that makes this pie so memorable and enjoyable.
Sweeteners: Sugar and Condensed Milk
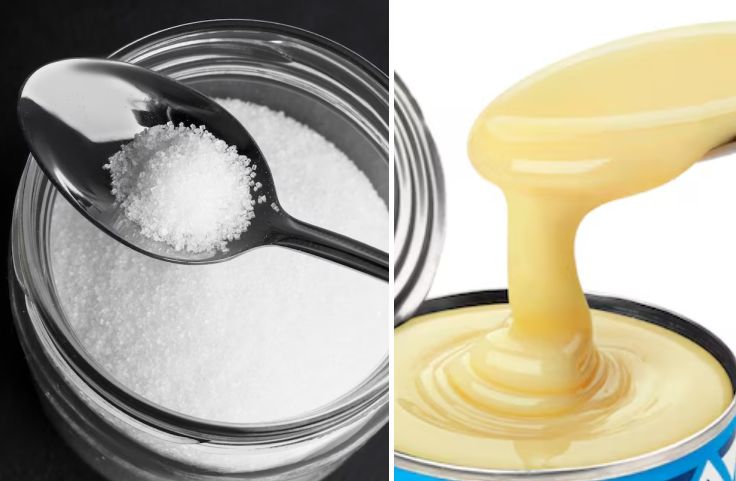
Granulated sugar provides the base sweetness while condensed milk deepens the flavor.
Together, they balance cassava’s earthy taste and the richness of coconut, giving the pie its familiar, lightly sweet profile that appeals to many palates.
Optional Add-Ins: More Flavor and Texture
Add shredded coconut for crunch, mung bean paste for depth, or pandan for fragrance.
A bit of tapioca starch thickens the mix. These extras let you customize the dessert, adding color, variety, and a personal twist to each batch.
Related Posts
- Bermuda Cassava Pie Recipe: A Savory Holiday Tradition
- How to Make Cassava Pie Crust
- Different Cassava Cake Recipes
- Cassava Root Recipes for Weight Loss
- How to Make Boba Pearls Without Tapioca Starch
- How to Bake Trinidad Cassava Pie
- The Fiji Cassava Pie: Step-by-step Guide
How to Make Vietnamese Cassava Pie (Step-by-Step)
A golden treat with chewy texture and sweet coconut flavor: Vietnamese cassava pie brings the taste of tradition straight to your table in just a few simple steps.
Gather and Prep Your Ingredients the Right Way
Before anything else, make sure you have everything ready: grated cassava, coconut milk, sugar, a pinch of salt, and grated coconut.
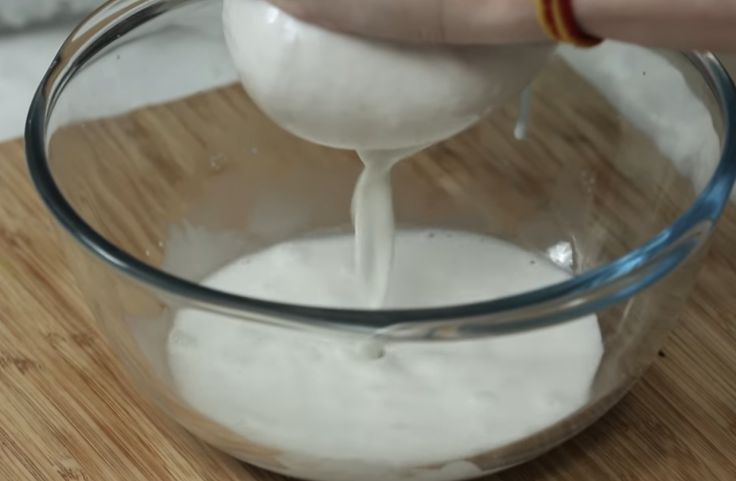
Rinse and squeeze the grated cassava to remove extra liquid. This helps your pie hold its shape.
If you skip this step, the texture can turn too wet or mushy.
Keep your oven heating to 180°C or your steamer ready with steady boiling water.
This way, your cooking process stays smooth and efficient.
Mix Your Cassava Batter Until It Looks Like Wet Dough
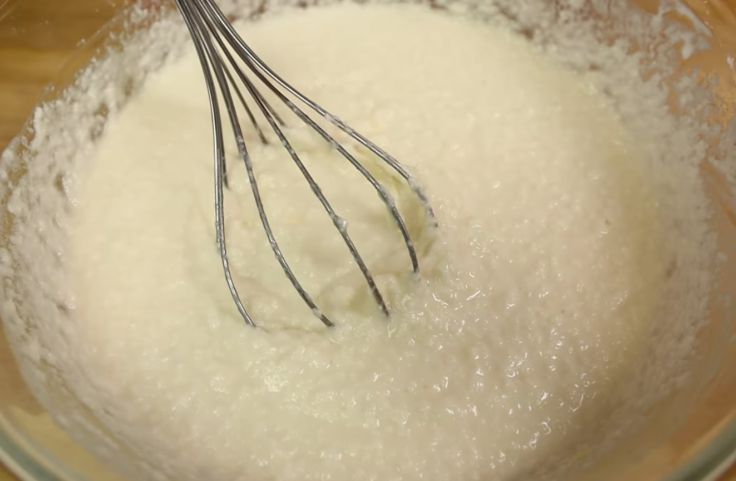
Grab a large bowl and pour in your drained cassava. Add the coconut milk, sugar, and just a pinch of salt.
Now stir slowly but thoroughly. You’re looking for everything to dissolve and blend into a smooth, thick mixture.
If your sugar isn’t dissolving well, let it sit for a minute, then stir again.
You’ll know it’s ready when the batter looks like wet dough and smells like fresh coconut.
Prepare the Pan So Nothing Sticks or Tears
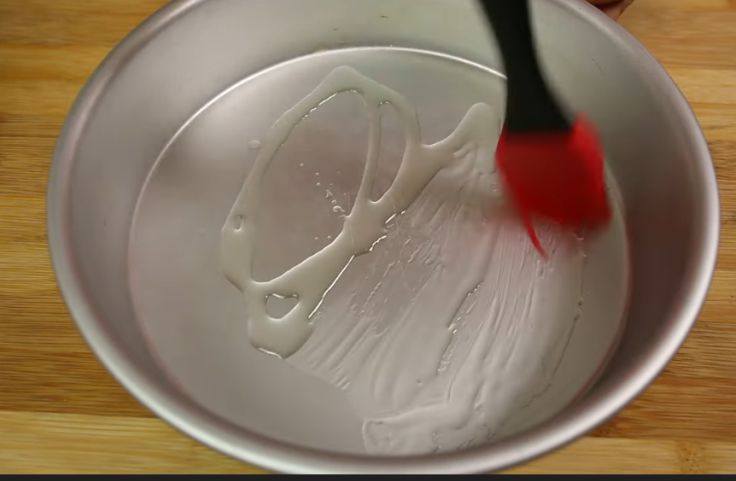
Use a bit of oil or soft butter to lightly grease your baking pan. This stops your pie from sticking when it’s time to slice.
If you’re steaming, line a heat-proof dish with greased parchment or banana leaves for a natural aroma and easy release.
Once ready, pour in half of the cassava batter and level it with a spoon.
Sprinkle grated coconut for added chew before pouring the rest of the mixture. Spread evenly from corner to corner.
Bake or Steam It Until Set and Golden
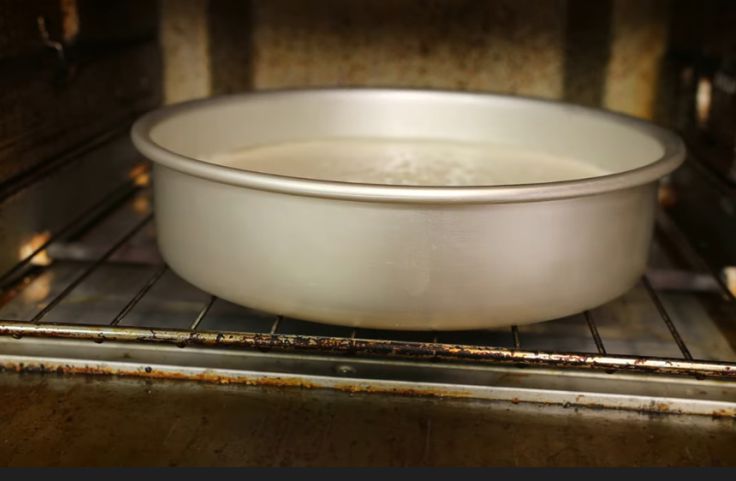
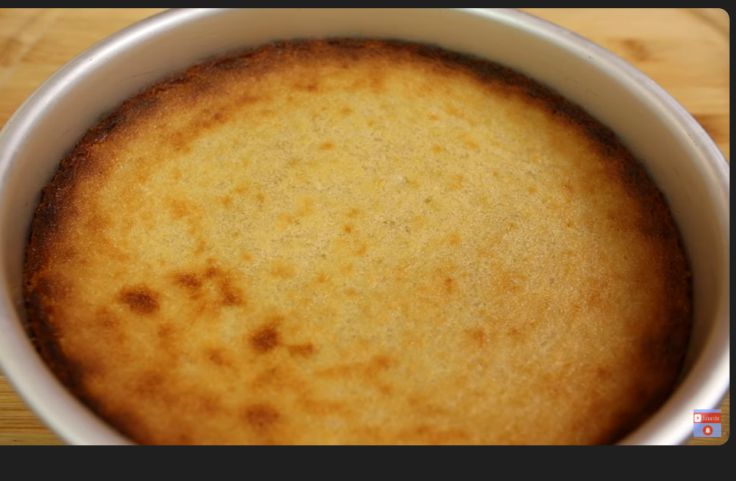
Place your pan in the hot oven and bake for 45 to 50 minutes. The top should turn golden and slightly crisp.
If steaming, cover and cook for 30 to 40 minutes. Keep checking the water level so it doesn’t dry out.
When it’s ready, a toothpick in the center will come out clean.
Let it cool in the pan for at least 15 minutes so it firms up and is easier to cut.
Slice and Serve
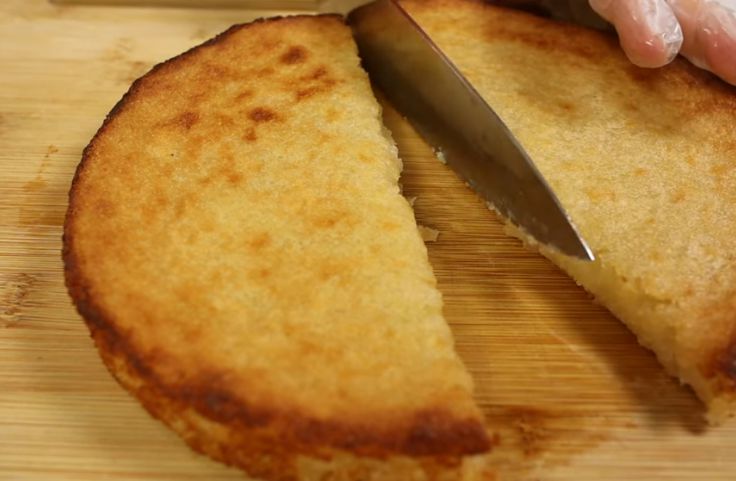
Once your cassava pie cools slightly, slide a knife along the edges to loosen it. Cut into neat squares or wedges.
This dessert tastes great warm, but it’s just as enjoyable at room temperature.
For the full experience, pair it with hot tea or serve it with fresh fruit on the side.
If you want leftovers, store them in an airtight container and warm slightly before eating.
How It Differs from Other Cassava Pies
Vietnamese cassava pie stands out with its sweet simplicity and chewy texture.
Unlike other versions, it keeps the spotlight on cassava, bringing you straight to the heart of Vietnamese flavors.
Vietnamese Cassava Pie vs Filipino Cassava Bibingka: Focus on Texture and Flavor
If you’ve tried Filipino cassava bibingka, you’ll notice it leans toward a creamy texture thanks to eggs and evaporated milk.
That version gives you a soft, custard-like center with a mellow sweetness.
But with bánh khoai mì, you’re getting a dense, chewy bite that puts cassava front and center.
No custard, no extra fluff. Just cassava, coconut milk, and sugar working together to create something honest and satisfying.
Vietnamese vs Caribbean Cassava Pie: Sweet Dessert vs Savory Meal
Caribbean cassava pie takes a different route. It’s usually savory and can include cheese, meat, or herbs. It’s more like a baked casserole than a dessert.
On the other hand, the Vietnamese version sticks to sugar and coconut milk.
It’s made for those moments when you want something sweet and comforting without being overly rich or spicy.
If you’re looking for a soft and lightly sweet snack, this one’s for you.
How Cooking Methods Create Different Outcomes
Filipino cassava pie is usually baked until the custard sets, while Caribbean versions may be baked or fried depending on local customs.
But Vietnamese cassava pie?
You bake it or steam it until the top sets and the inside stays tender. This method helps create a golden surface with a chewy middle.
It’s this simplicity that gives Vietnamese cassava pie its charm; it lets the ingredients speak for themselves with no need for heavy creams or complicated steps.
When and Where It’s Enjoyed in Vietnam
Cassava pie in Vietnam is more than a dessert. It connects generations, flavors, and memories.
From street corners to holiday tables, it brings people together in the simplest and warmest ways.
Street Food Comfort You Can Grab Anytime
In many Vietnamese towns and cities, you’ll find cassava pie at local markets or small food stalls.
Vendors slice it into thick blocks, warm and fragrant, drawing you in with its slightly crispy edges and soft center.
It’s easy to carry, easy to share, and doesn’t need any fancy toppings.
Whether you’re rushing home from work or strolling through the neighborhood, this dessert fits right into your hand and your day.
A Symbol of Togetherness During Tet Celebrations
During Tet, Vietnam’s Lunar New Year, cassava pie becomes more than just food.
Families gather to prepare and serve it as part of the holiday spread.
It sits on the table alongside sticky rice cakes and spring rolls, shining with its golden color and sweet aroma.
Serving cassava pie during Tet is a quiet way to show love, welcome luck, and keep family traditions alive.
When you pass it around the table, you’re passing along stories, too.
A Homemade Favorite in Southern Vietnamese Homes
In many southern households, especially in rural communities, cassava pie is made at home for birthdays, casual visits, or no special reason at all.
Someone grates the cassava, someone stirs the mixture, and someone watches the oven.
This shared task turns into laughter and talk. You don’t just eat the pie, you remember who made it with you.
That’s what makes it more than a dessert. It becomes part of your family’s rhythm, stitched into weekends and small joys.
Tips for a Perfect Vietnamese Cassava Pie
Making Vietnamese cassava pie that’s sweet, chewy, and golden requires a few simple but important steps.
These tips will help you get the texture, taste, and aroma just right every time.
Squeeze Out the Extra Liquid or You’ll Get a Soggy Pie
Cassava holds a lot of water, and that can ruin the texture if you skip this step.
Use a clean kitchen towel or cheesecloth to wrap the grated cassava and twist hard.
You might need to do it in batches. Keep squeezing until the cassava feels slightly dry and clumps when pressed.
This helps your pie bake evenly and prevents it from turning out heavy or wet in the middle.
Always Bake in a Preheated Oven and Watch the Color
Set your oven to 180°C or 350°F before placing your pie inside.
This gives you the heat you need from the start to create a nice golden top without burning the edges.
Bake until the surface turns golden brown and a toothpick pushed into the center comes out clean.
If the top browns too quickly, cover it lightly with foil during the last few minutes. Keep checking so it stays chewy inside and crisp outside.
Let It Rest After Baking for Better Texture and Taste
Once you pull the pie out of the oven, leave it alone for 15 to 20 minutes.
This resting time lets the pie firm up, making it easier to cut into clean slices.
The flavors also settle during this time, giving you a deeper coconut and cassava taste with every bite.
If you cut it too soon, the inside may feel mushy or fall apart. Patience here makes a real difference.
Storage and Serving Suggestions for Vietnamese Cassava Pie
If you want to enjoy every last bite of your Vietnamese cassava pie, storing it the right way matters.
Here’s how to keep it fresh and serve it at its best.
Keep It at Room Temperature If You’ll Eat It Soon
If you’re planning to eat the pie within the same day, just cover it and leave it on the counter.
A clean container or a plate with foil works fine. Room temperature keeps the texture soft and chewy without drying it out.
But don’t leave it sitting out for more than a day. After that, the pie starts to lose its flavor and may spoil, especially in warm weather.
Refrigerate for Longer Shelf Life Without Losing Taste
For storage beyond a day, wait until the pie has cooled completely.
Then place it in an airtight container and refrigerate.
This keeps it fresh for up to a week. To avoid sogginess, make sure no steam or moisture gets trapped before sealing.
When you’re ready to eat it again, don’t just grab a cold slice.
Reheat it to bring back that crisp top and soft middle that makes it special.
Reheat in the Oven for That Freshly Baked Feel
Skip the microwave. If you want that same fresh-from-the-oven taste, reheat slices in an oven at 175°C or 350°F for 10 to 15 minutes.
This warms the center while reviving the slightly golden crust.
The aroma returns, and the texture feels just right again.
It’s worth the few extra minutes. For smaller pieces, use a toaster oven and keep an eye on it so it doesn’t dry out.
Pair It with Vietnamese Coffee or Tea for a Complete Treat
Serve your cassava pie with a drink that balances the sweetness.
A strong glass of iced Vietnamese coffee adds bold flavor, especially with the hint of condensed milk.
If you prefer something lighter, jasmine or lotus tea offers a calming contrast.
This simple pairing turns a casual snack into something comforting and memorable, just the way it’s enjoyed across homes in Vietnam.
Frequently Asked Questions
Can I use frozen cassava for Vietnamese cassava pie?
Yes. Frozen grated cassava works well. Just thaw it completely and squeeze out excess water before mixing to avoid a soggy or overly wet pie.
What can I add to make my cassava pie taste better?
You can mix in mung bean paste, shredded coconut, or pandan. These add texture, aroma, and a deeper flavor that makes each bite more enjoyable.
Is Vietnamese cassava pie gluten-free?
Yes. Vietnamese cassava pie contains no wheat flour, making it naturally gluten-free. It’s made with cassava, coconut milk, and sugar, simple and safe for gluten-sensitive eaters.
How do I know my cassava pie is done baking?
Check with a toothpick. Insert it in the center. If it comes out clean and the top is golden brown, your cassava pie is ready to cool and slice.
Conclusion
Vietnamese cassava pie is more than a sweet treat; it’s a piece of tradition passed down through hands and hearts.
You don’t need to master complicated steps. Just grate, mix, and bake with patience.
Each bite brings the creamy flavor of coconut and the chewy warmth of cassava.
Whether shared during Tet, handed out at family gatherings, or enjoyed alone with tea, it always feels like home.
The recipe is flexible, welcoming little twists like pandan or mung beans. But at its heart, it stays the same, comforting, simple, and filled with care.
Now it’s your turn to make it, taste it, and maybe pass it on to someone else.
References
Chimeremeze Emeh is a tropical crop farmer and chemical engineer from Ntigha, Isiala Ngwa North LGA, Abia State, Eastern Nigeria, specializing in cassava and palm oil, with over 30 years of hands-on experience growing, harvesting, and processing cassava. He grows TMS 419, TME 419, and local traditional varieties on his own farms and operates a small-scale cassava flour and starch production business through Cassava Pathway, which he founded as a CAMA-registered agribusiness in 2024. He is also the founder of Palm Oil Pathway, where he applies the same tropical farming expertise. His farms are located in Ntigha, Abia State.