Learn how to apply fertilizer to cassava plant for optimal growth and yield. Also know about essential nutrient needs, soil tests, and effective application techniques for better productivity and sustainable farming practices.
To maximize the potential of cassava, proper agricultural practices are essential, of which fertilizer application is one of the most important.
Fertilizers provide the needed nutrients that support healthy growth and increase the productivity of cassava plants.
Nutrient deficiencies can lead to stunted growth, low yields, and poor-quality tubers, which directly affect both smallholder and commercial farmers.
That’s why understanding how to apply fertilizer to cassava plant is important for achieving optimal results.
This guide outlines key steps to help you apply fertilizer effectively to your cassava and farm.
Fertilizer application is more than just scattering nutrients on the soil, it requires a thoughtful approach that considers soil health, crop needs, and timing.
From soil testing to choosing the right fertilizer type and applying it correctly, each step ensures your cassava receives the best care for maximum yield and sustainability.
Recommended: Complete Guide on Cassava Farming

Fertilizer Needs for Cassava
Cassava grows well in many places, even in low-fertility soils. But if you want strong plants and big tubers, your soil has to provide the right nutrients.
Key Nutrients to Watch
Cassava depends heavily on three main nutrients:
- Nitrogen (N): Helps your cassava grow lots of healthy green leaves
- Phosphorus (P): Supports good root development and energy flow
- Potassium (K): Boosts tuber size and improves drought resistance
But that’s not all. Your soil also needs to supply:
- Magnesium, sulfur, calcium
- Trace minerals like zinc, boron, and iron
These support key plant functions like chlorophyll production, root strength, and disease resistance.
Start with a Soil Test
Before you apply anything, get your soil tested. This tells you exactly what’s missing or too much. Skipping this step means guessing, and guessing leads to waste or poor growth.
Here’s how to do it right:
- Collect samples from different parts of your farm
- Mix the samples together to get one average sample
- Send the sample to a lab for analysis
Once your results come back, look at nutrient levels and pH. You’ll also get recommendations on what type and how much fertilizer to use.
Make Fertilizer Decisions Based on the Results
Your soil test tells you what your cassava needs. Use this to choose the right fertilizer and amount.
Applying too much wastes money and can damage your crop. Applying too little stunts growth.
Stick to a plan based on your soil, your climate, and your goals. This kind of precision helps your cassava thrive without hurting the environment or draining your wallet.
Recommended: What Best Time to Plant Cassava?
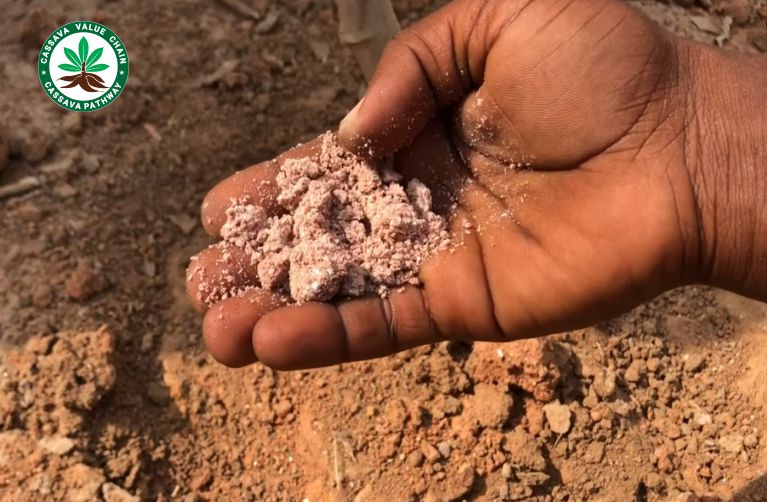
Types of Fertilizers Suitable for Cassava
When you’re growing cassava, choosing the right fertilizer affects how well your plants grow and how much you harvest.
The two main options are organic and inorganic fertilizers. Each works in different ways, and the best choice depends on your soil, the growth stage, and your goals for the season.
Organic Fertilizers: Natural but Slower
Organic fertilizers come from natural sources. These include:
- Compost
- Animal manure
- Green manure
- Crop residues
These feed the soil as well as the plant. They help improve soil structure, encourage microbial life, and build long-term soil health.
But they take time to break down, so if your cassava needs a quick nutrient boost, they may not act fast enough.
You may also need to apply them in larger quantities to meet the plant’s needs.
Inorganic Fertilizers: Fast and Targeted
Inorganic fertilizers are man-made and give nutrients in a ready-to-use form. Common types used in cassava farming include:
- Urea
- Ammonium sulfate
- NPK blends like 15:15:15 or 20:10:10
These release nutrients quickly, which is helpful during key growth stages when cassava needs more support.
For example, a 15:15:15 NPK works well at planting, while a 20:10:10 can be applied later to support tuber development.
If you rely too much on inorganic options without improving the soil, you risk reducing soil fertility over time.
It’s smart to combine both methods or rotate them season by season.
Related: The Required Climate Conditions for Cassava Farming
Foliar Fertilizers: Extra Boost When Needed
Foliar fertilizers are sprayed directly on the leaves. They help when your plants need a quick fix of micronutrients like:
- Zinc
- Magnesium
- Boron
Spray them around 6 to 8 weeks after planting. Morning or late afternoon is best to avoid evaporation. This method supports healthy leaves and overall plant growth without overloading the soil.
Choose What Fits Your Soil and Season
Use your soil test results to decide which type of fertilizer to apply and when. You can also ask your local extension office or farm cooperative for advice.
Some brands like YaraLiva or blends from local agri-stores are made to match your region’s soil.
Your goal is simple: feed the plant without harming the soil. Mix and match where needed. Keep an eye on how your cassava responds.
The best fertilizer plan is the one that works for your farm, your budget, and your yield target.
Related: How to Grow Cassava in Small Spaces
When to Apply Fertilizer to Cassava
When to Apply Fertilizer to Cassava
Getting the timing right makes a big difference in how well your cassava grows. Fertilizer needs to match the plant’s growth stages, so nutrients are available when they’re most needed.
Before You Plant: Prepare the Soil
Start with good land preparation. Mix organic matter like compost or manure into the soil before planting.
You can also add a basal fertilizer to improve soil condition and support early growth. This step sets the stage for healthy root formation.
At Planting: Use a Starter Fertilizer
During planting, you can apply a small amount of starter fertilizer. A balanced NPK mix, such as 15:15:15, works well here. This helps cassava cuttings develop strong roots and adjust quickly to the soil.
Four to Six Weeks After Planting: Boost Early Growth
At this stage, your cassava plants are growing fast. Apply a side dressing of nitrogen-rich fertilizer like urea or ammonium sulfate.
Spread it a short distance from the base of the plants and cover it lightly with soil. This supports leaf growth and photosynthesis, both needed for tuber formation later on.
Three to Five Months After Planting: Focus on Tuber Growth
Now your cassava is developing tubers. This is the right time to apply more phosphorus and potassium.
Use NPK blends with higher potassium like 20:10:10 or custom options based on your soil test. Potassium helps tubers bulk up and improves storage quality.
Time It with the Rain or Your Watering Schedule
If your farm relies on rain, apply fertilizer just before the rainy season begins. Rain helps move nutrients into the root zone.
For irrigated farms, you can control watering to match fertilizer application. Avoid applying fertilizer when the soil is dry to prevent nutrient loss.
Recommended: 6 Best Practices in Cassava Farming
How to Apply Fertilizer to Cassava Plant and Farm
If you’re growing cassava, how you apply fertilizer can make a big difference in your harvest.
The right method helps your plants grow strong and gives you better yields. There are a few common ways to apply fertilizer to cassava.
What works best depends on your farm size, the tools you have, and your soil’s condition.
Main Fertilizer Application Methods for Cassava
- Banding: Place the fertilizer in a narrow line close to the root zone. This helps the roots absorb nutrients quickly. Use this method early in the growing season when the plant needs a boost.
- Side dressing: Apply fertilizer in a shallow trench beside the plant, a few inches away from the stem. This works well when your cassava is in its growing phase and needs more nitrogen to push leaf and stem growth.
- Spot application: Add fertilizer around the base of each plant. This is good if you’re working on a smaller plot and want to give each plant focused attention.
- Broadcasting: Spread fertilizer across the whole field. It saves time on larger farms but can lead to uneven feeding if not done carefully. Make sure to water or lightly rake it in to avoid nutrient loss.
Fertilizer Use with Intercropping
If you’re growing other crops with your cassava, you’ll need to be more precise. Different crops take up nutrients in different ways.
A soil test will help you know exactly what your land needs. Don’t guess, this step helps you avoid wasting money and time.
Make the Most of Your Tools
Using simple farm tools or machinery can speed up the job. For big farms, a spreader or sprayer can save you hours. On smaller plots, a hoe or hand tool works just fine. The goal is to apply the right amount evenly so every plant gets fed.
Quick Tips for Better Results
- Follow up with watering to help nutrients reach the roots
- Apply fertilizer when the soil is moist, not dry
- Use protective gloves when handling chemical fertilizers
- Don’t let fertilizer touch the stems directly
Related: Preparing the Soil and Planting Cassava Cuttings
Dos and Don’ts of Fertilizer Application for Cassava
Getting fertilizer application right is key to helping your cassava thrive. By following a few simple dos and don’ts, you can support healthy growth and maximize your harvest.
Dos for Fertilizer Application
- Water After Fertilizing: Always water your cassava after applying fertilizer. Water helps move nutrients into the soil, making them easier for the roots to absorb. It also prevents fertilizer burn by diluting excess salts.
- Wear Protective Gear: When handling fertilizers, always wear gloves and a mask, especially if you’re using synthetic products. These chemicals can be harmful if they come into direct contact with your skin or if inhaled.
- Store Fertilizers Properly: Store your fertilizers in a cool, dry place away from sunlight. Keeping them in a sealed container will preserve their effectiveness and prevent degradation.
Related: Cassava Planting Methods
Don’ts for Fertilizer Application
- Avoid Direct Application on Stems or Leaves: Never apply fertilizer directly to the stems or leaves of your cassava plants. Doing so can cause fertilizer burn, damaging the plant and slowing its growth.
- Don’t Over-Fertilize: Over-fertilizing is a common mistake. Too much fertilizer can disrupt the nutrient balance in the soil and lead to nutrient lockout, meaning your plants can’t absorb what they need. Stick to the recommended amount based on soil tests.
- Choose the Right Fertilizer: Not all fertilizers work for cassava. Look for fertilizers with high levels of potassium and phosphorus, as these nutrients support root development. Avoid using general-purpose fertilizers that may not meet your cassava’s specific needs.
By following these simple guidelines, you’ll improve your cassava’s health and ensure you get the best possible yield.
Related: How Does the Cassava Value Chain Work?
Monitoring and Adjusting Fertilizer Use
To ensure your cassava thrives, it’s important to regularly monitor and adjust your fertilizer use.
By keeping an eye on plant health and conducting soil tests, you can address nutrient imbalances and boost your crop’s productivity.
Watch for Nutrient Deficiencies or Excesses
Cassava plants show clear signs when they need more or less of certain nutrients. For example, yellowing leaves, stunted growth, or poor root development might point to a nitrogen deficiency.
On the other hand, if you notice excessive leaf growth with poor root formation, it could be a sign of too much nitrogen, which weakens plants and makes them more prone to diseases.
Use Soil Tests to Assess Nutrient Levels
Soil testing is one of the most reliable ways to check nutrient levels and pH balance in your soil. Aim to test your soil at least once a year, especially before fertilizing.
The results will help you fine-tune your fertilizer application, whether you need to adjust the type, quantity, or timing of the fertilizers.
Keep Track of Fertilizer Applications
Record all your fertilizer applications, dates, amounts, types of fertilizer, and any changes you notice in your plants.
This log will help you understand what works best and guide your decisions for future applications.
It can also give you insights into how environmental factors, like heavy rainfall, affect nutrient availability and soil health.
Adjust Fertilizer Use Based on Plant Health and Conditions
By staying alert to visual cues and soil test results, you’ll be able to adjust your fertilizer use throughout the growing season.
Regular monitoring and adjustment will help you keep your cassava healthy and productive, making the most of available nutrients while adapting to changing weather conditions.
Conclusion
Knowing how to apply fertilizer to cassava plants properly is vital for achieving high yields and maintaining healthy crops.
Start by conducting a soil test to identify nutrient deficiencies and choose the right fertilizer based on the results.
Timing is also key, with fertilizer application best suited for early growth stages and key development periods.
Using techniques like side-dressing and banding ensures better nutrient uptake while minimizing waste.
By combining these practices with regular monitoring and responsible fertilization methods, you’ll boost cassava growth, maximize productivity, and promote sustainable farming for long-term success.
References
- Cassava response to the integrated use of manure and NPK fertilizer in Zambia
- Impact of Planting Dates and Fertilizer on Soil Properties and Cassava Growth
- Effects Of Fertilizer Application On The Composition Of Cassava Roots And Their Garri Product

Chimeremeze Emeh is a writer and researcher passionate about Africa’s most transformative root crop—cassava. Through his work at cassavavaluechain.com, he explores the entire cassava industry, from cultivation and processing to its diverse applications in food, health, and industrial use.
He also writes for palmoilpalm.com, where he shares his extensive experience and deep-rooted knowledge of palm oil, covering red palm oil, palm kernel oil, and refined products. His work there reflects his lifelong connection to agriculture and his commitment to promoting sustainable value chains in Africa.
Driven by curiosity and purpose, Chimeremeze aims to shed light on how cassava continues to empower communities, strengthen food systems, and link traditional farming wisdom with modern innovation.